DIY Help Desk: Self-Hosting Your Support System
A Guide to Building a Support System at Home or in the Cloud with Peppermint


When starting a career in IT or cybersecurity, entry-level positions such as Help Desk and Tech Support are among the most common. These roles require strong troubleshooting skills and the ability to solve technical problems. However, demonstrating these skills through effective and professional resolution and documentation of support tickets can add significant value to your resume.
Today, we'll achieve this by deploying a Docker container called Peppermint. This open-source, free alternative to popular ticket management and support systems like Zendesk will provide you with hands-on experience. By setting up your own help desk system, you'll gain practical insights into the tasks and procedures involved, bolstering your credentials and preparing you for your IT or cybersecurity journey.
Choosing Your Deployment Method
Before we get started with Peppermint, we need to decide how to deploy Docker and its containers. Here are your options:
- Virtual Machine (VM) Setup: Use VirtualBox or VMware Workstation Pro to create a VM for Docker deployment. This method is ideal if you want to isolate the environment and manage it independently of your host system.
- Cloud VM Deployment: Deploy Docker on a cloud-based VM. This approach is useful if you prefer a scalable, remote solution and want to practice managing cloud resources.
Each method has its advantages, and the choice depends on your specific needs and resources. Let's dive into the deployment process to get you up and running with Peppermint.
Using VirtualBox to Create a VM
Follow these steps to create a Virtual Machine (VM) using VirtualBox on a Windows OS host. If you are already using Linux, you can skip to the installation of the container. If you are on a Mac, the steps are similar; just ensure your hardware supports virtualization.
Download and Install VirtualBox
- Go to the VirtualBox website.
- Click the Download button
- Under “VirtualBox platform packages,” click on “Windows hosts” (or “macOS” if you're on a Mac).
- Download and run the installer.
- Follow the installation prompts, accept the terms and conditions, and restart your computer if necessary.
- Launch VirtualBox once the installation is complete.
Choose Your Linux Distribution
- For this tutorial, we will use Ubuntu, but Debian is also a good choice.
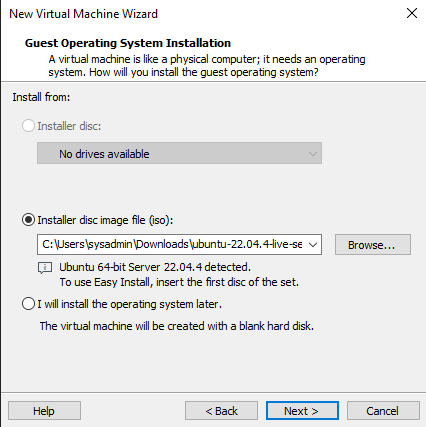
- Go to the Ubuntu website and download the server or desktop version ISO file. The server version is command-line only, while the desktop version includes a graphical user interface (GUI). Choose the version that best suits your needs.
Create Your Linux VM in VirtualBox
- Open VirtualBox and click “New” to create a new VM.
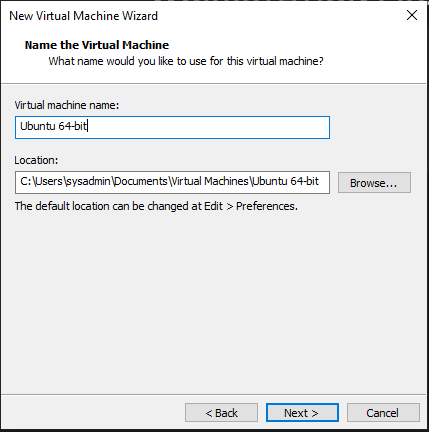
- Follow the prompts to name your VM and select ISO Image then click “Other…”, navigate to your downloaded ISO and click “Open.”

- Type and Version will be auto selected based off the chosen ISO file.
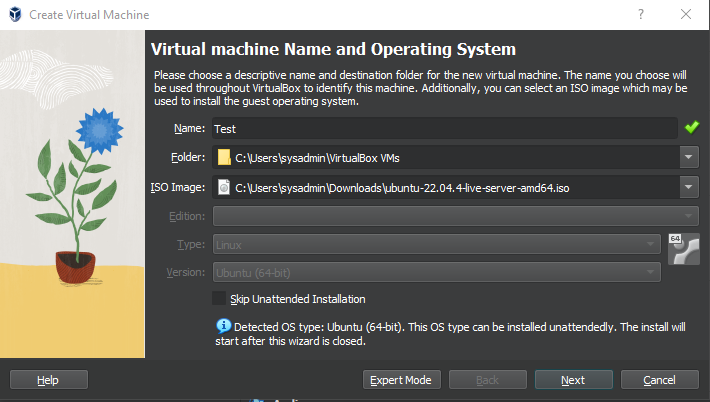
- Make sure to check the box next to “Skip Unattended Installation”.
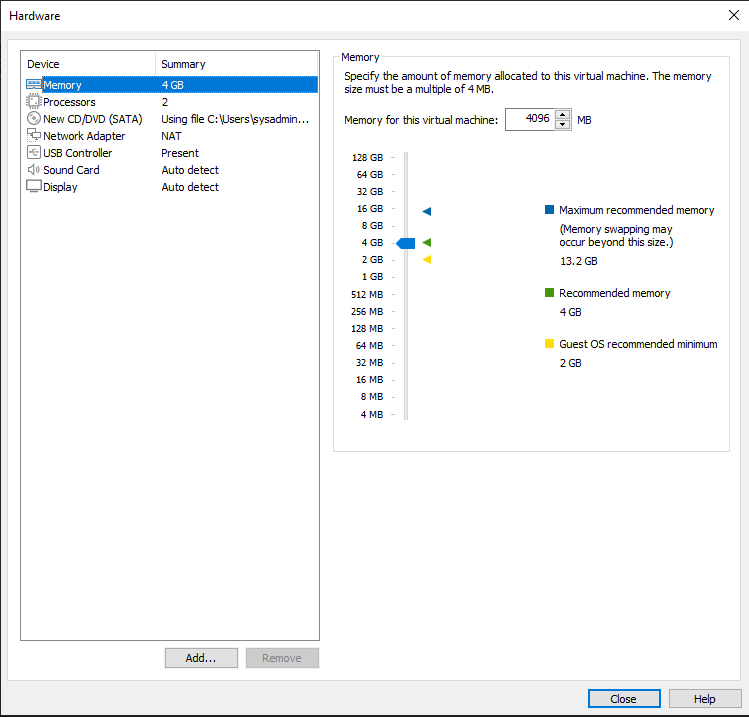
- Allocate the desired amount of RAM (at least 4096 MB is recommended).
- Allocate at least 2 CPU processors (not recommended going above half of total CPU cores, may slow down host OS).
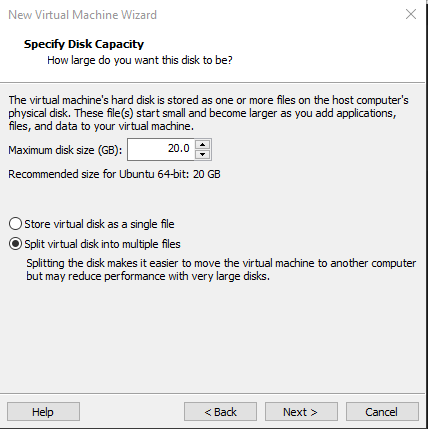
- Create a virtual hard disk by selecting “Create a virtual hard disk now” and following the prompts to allocate storage space (at least 20 GB is recommended).
- Once you reach the end, click finish.
- Start the VM to proceed with the installation.
Following these steps, you will have a Linux VM ready for further configuration and software deployment, providing a robust environment to gain hands-on experience.
Using VMware to Create a VM
Recently, Michael Roy announced that VMware Workstation Pro is now free for personal use. This is great news for users who want to set up a virtual lab on their Mac, Windows, or Linux computer. To get started, simply register and download the software from the new download portal at support.broadcom.com.
Steps to Create a VM with VMware Workstation Pro
- Download and Install VMware Workstation Pro: Visit support.broadcom.com to register and download VMware Workstation Pro. Follow the installation instructions provided on the site.
- Launch VMware Workstation Pro: Open the application after installation.
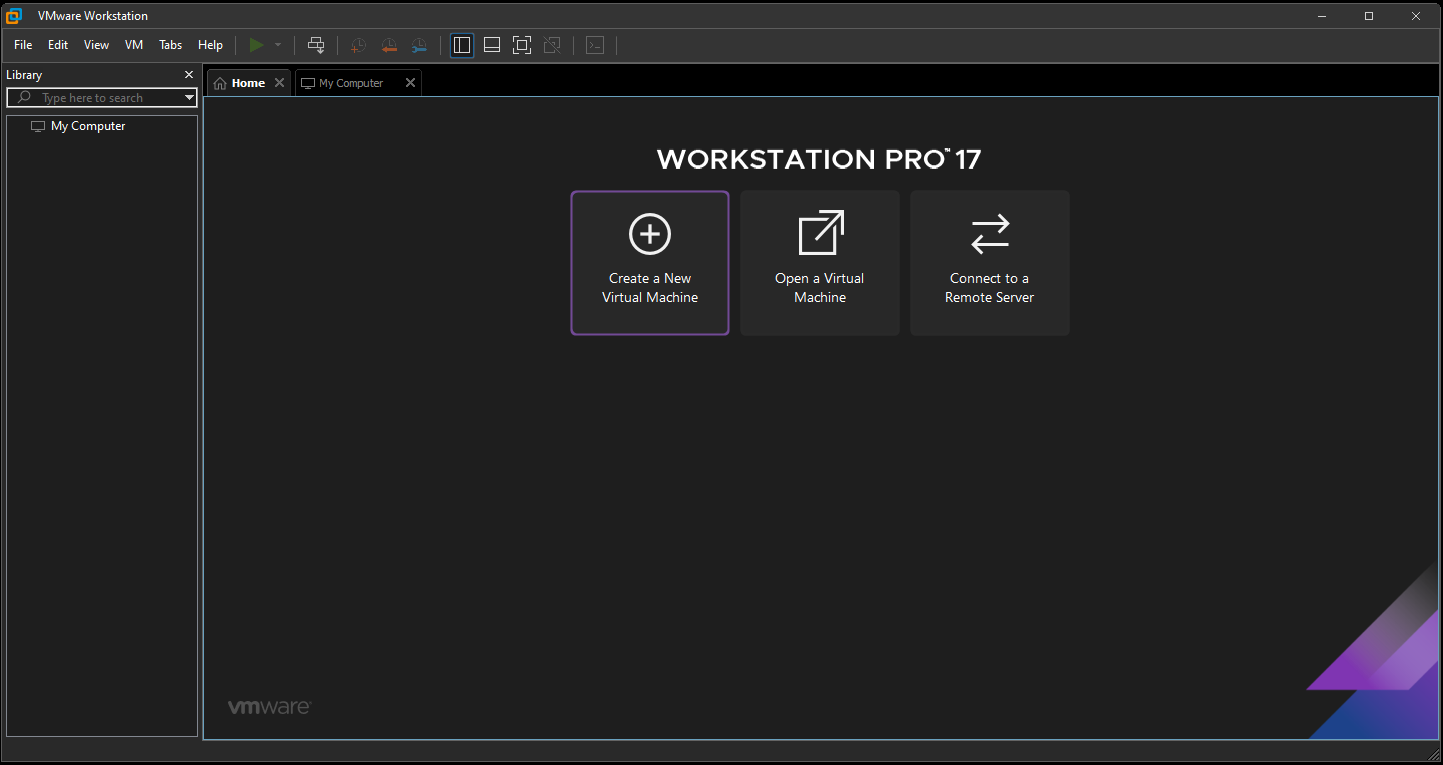
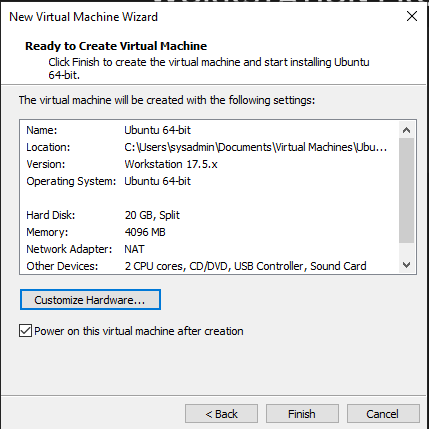
- Create a New Virtual Machine
- Click on “Create a New Virtual Machine.”
- Choose the type of configuration: “Typical” is recommended for most users.
Select the installation media: Go to the Ubuntu website and download the server or desktop version ISO file. The server version is command-line only, while the desktop version includes a graphical user interface (GUI). Decide the version that best suits your needs.
- Configure the VM
- Guest Operating System: Select the operating system you plan to install (e.g., Ubuntu, Debian, Pop!OS).
- Name the VM: Give your VM a name and select a location to store the VM files.
- Specify Disk Capacity: Allocate the disk size for your VM. The default settings usually suffice for most needs.
- Customize Hardware: Adjust the VM’s hardware settings (e.g., memory, processors) if necessary.
To enable the bridged adapter in VMware and allow your VM to communicate with other devices on the network, follow these steps:
- Navigate to Edit and select Virtual Network Editor.

- Click on Change Settings.
- In the VMnet information box area, ensure that VMnet0 is set to the "Bridged" type.
- Click the dropdown menu next to "Bridged to: automatic" and select your PC's wireless card or Ethernet port.
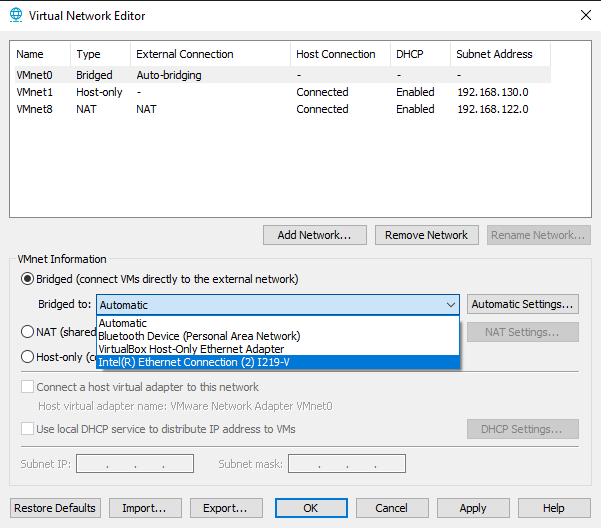
- Click Apply then OK.
- Finish and Power On: Complete the setup and power on the VM. Follow the on-screen instructions to install the operating system.
Deploying a Cloud Instance
In this section, we'll explore how to launch a cloud VM using Linode. While Linode is the focus here, it's worth noting that other cloud providers like AWS, Google Cloud, and Digital Ocean offer similar processes with slight variations.
Steps to Launch a Linode VM
- Sign Up on Linode: Visit linode.com and sign up with your email or GitHub account. Some content creators may offer promotion codes that provide up to $100 in funds. If you can find a promotion link on YouTube, it can be beneficial as you won't have to pay initially. Otherwise, you'll need to link a credit card and verify your email or phone number.
- Access Linode Dashboard: After signing up, you'll be directed to the Linode dashboard.
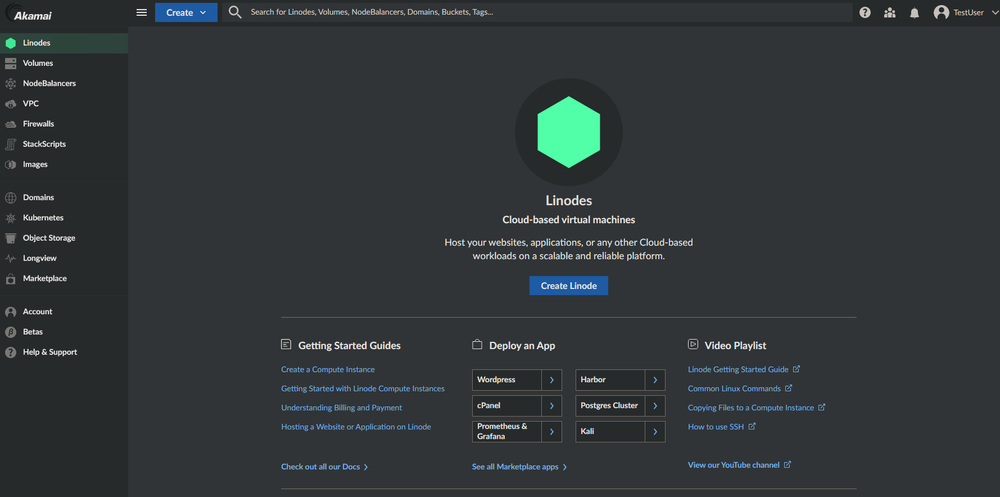
Create a Linode Instance
- Click on "Create Linode" to begin the process.
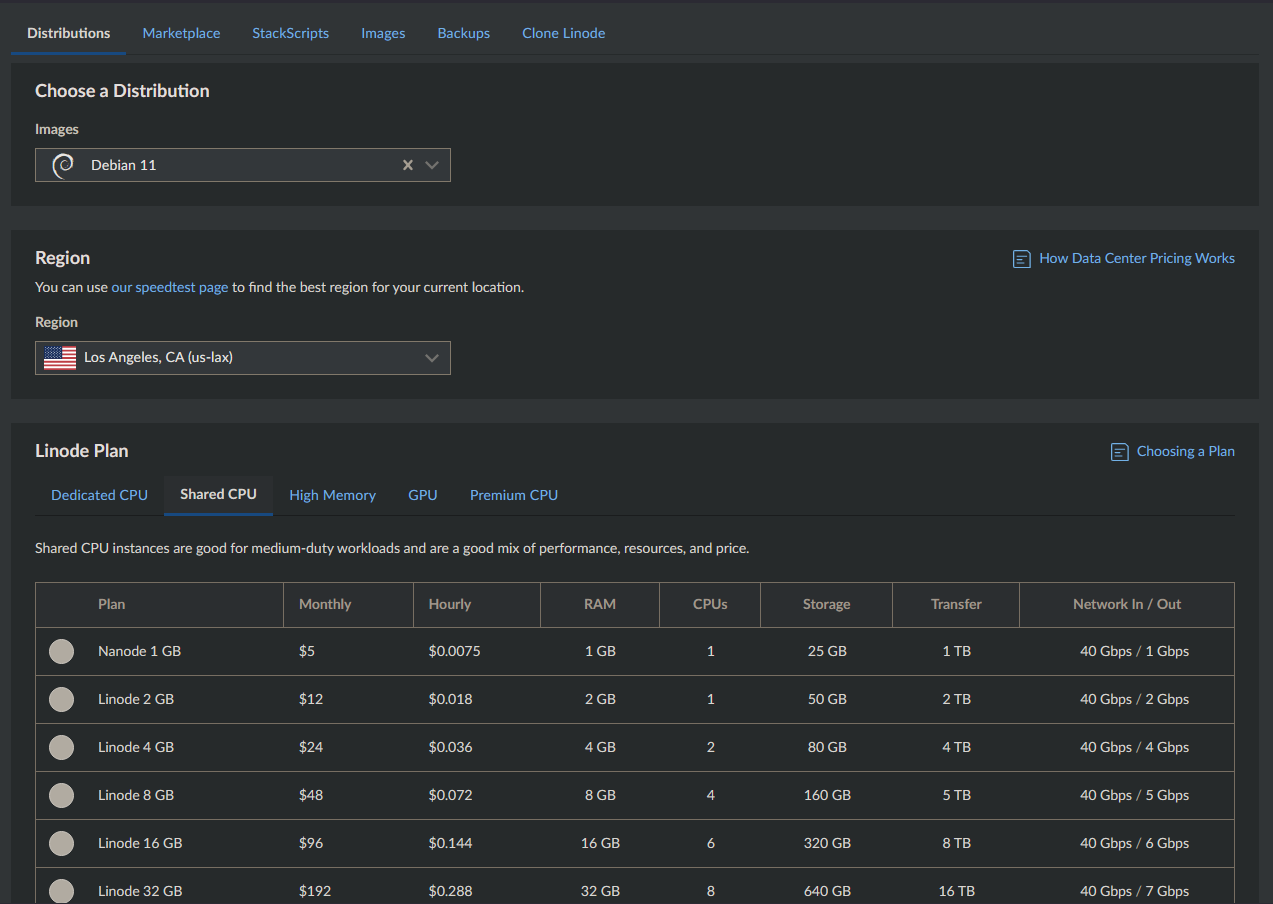
- Name your server and select a distribution such as Ubuntu or Debian.
- Set a root password for your VM.
- Choose a plan for your VM. The Nanode plan located in "Shared CPU" is typically the most economical option.
- Deploy your VM.

Access Your VM: Once your VM is deployed, you can log in using the root user and the IP address provided by Linode. Use the following format: ssh root@ip.

By following these steps, you'll have successfully launched a cloud instance on Linode, providing you with a scalable and flexible environment for your projects.
Installing the OS
- Launch the VM: Whether you're using VirtualBox or VMware (skip if you're on cloud), start your VM and select “Try or Install Ubuntu Server/Desktop.”
- Welcome Screen: You'll be greeted with a welcome screen. Use the up and down arrow keys to select your preferred language.
- Installer Update: If you have the latest version of the ISO, you might not see the “Installer update available” prompt. If you do see it, select “Continue without updating.” We'll handle system updates after the installation.
- Keyboard Layout: Choose your keyboard layout, typically “English (US).”
- Installation Type: Select “Ubuntu Server” for the installation type. Do not select the minimized version. Click “Done” to proceed.
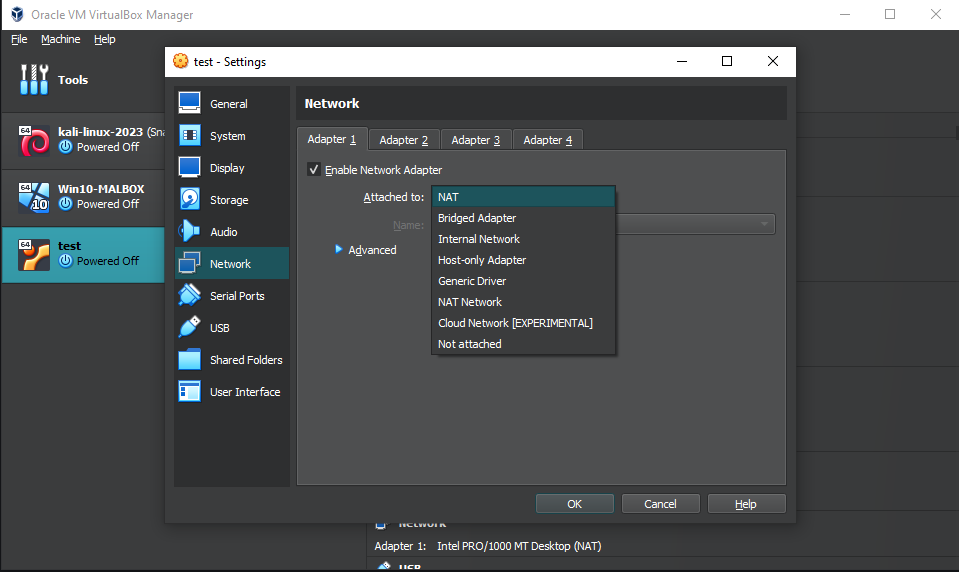
- Network Connections (Bridged/Host-Only Adapter):
- Set up a static IP address. Navigate to the Ethernet adapter (usually labeled enp0s1 or eth0 ) using the arrow keys.
- Use the right arrow to bring up the sub-menu, navigate to “Edit IPv4,” and hit enter.
- Set the IPv4 method to “Manual.”
- During the configuration of your VM, you should have decided whether you want the VM to be accessible on your local network or just on your host machine. This is done by selecting either a bridged adapter, which makes the VM accessible to the local network, or a host-only adapter, which keeps it accessible only by your host machine.
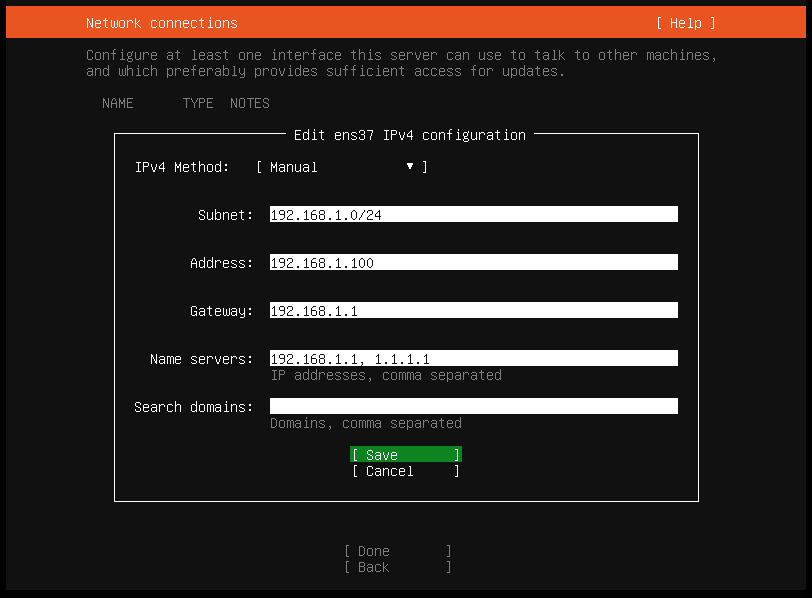
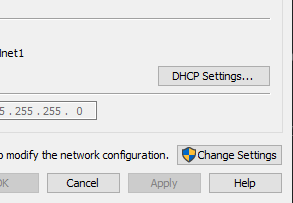
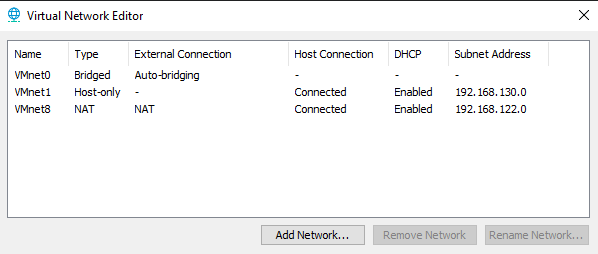
ipconfig, ifconfig, or ip a to display your network configuration. Most networks provided by ISPs typically use the 192.168.0.0/24 subnet. For example, if the output indicates that your host machine has an IP address of 192.168.0.126 and a subnet mask of 255.255.255.0, it's safe to assume that your subnet is 192.168.0.0/24.ipconfig, ifconfig, or ip a in a terminal. The adapter will typically be named something like "VMware Network Adapter VMnet1" or "Ethernet Adapter 2". If you choose to set a static IP, make sure to enter the network details accurately during the Ubuntu installation.- Fill in the subnet, IP address, gateway, and nameservers (typically the gateway, followed by backup DNS servers like 1.1.1.1 or 9.9.9.9) as needed.
- Click “Save,” wait for changes to apply, and proceed to the next steps.
- Configure Proxy: Leave this blank and skip.
- Ubuntu Archive Mirror: Wait for the test to complete. If it fails, your VM may not be able access the internet. You may need to recheck your network configuration in both the installation settings and the VM manager.
- Storage Configuration: Skip this and click “Done” for each prompt.
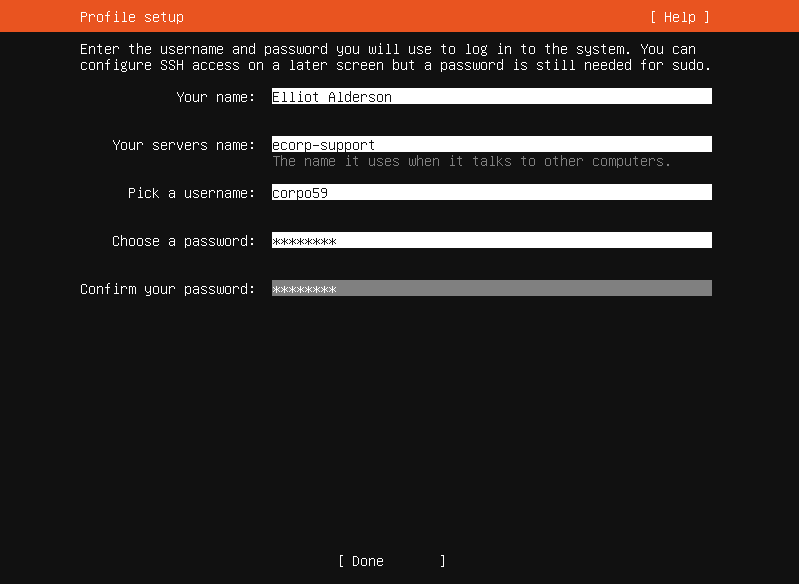
- Profile Setup: Set a username, password, and server name.
- Ubuntu Pro: Skip this for now and continue.
- SSH Setup: Install the ssh server, we may need to connect into the VM.
- Server Snaps: Do not install any Snap packages at this stage. Snap packages can sometimes cause issues; we'll install necessary apps and packages after the OS installation and update sequence.
- Server Installation: The server will now install. Once completed, you will be prompted to reboot. If the system does not allow you to reboot into the OS, you may need to remove the ISO image from the VM settings.
By following these steps, you'll successfully install the operating system on your VM and be ready to proceed with further configurations.
Update, Upgrade and Install
Before deploying the container, we need to make sure our system is up to date and has the necessary tools installed. If you're using a cloud instance, it's recommended to follow the linked guides for initial setup and configuration, particularly if you plan to use it long term. Log into your newly created VM or cloud instance with the username and password you set during the installation.
Commands to Run
- Update and Upgrade
- Command:
sudo apt update && sudo apt upgrade -y - Explanation: This command updates the package lists for available software and upgrades the installed packages to their latest versions. It's essential to ensure that your system is equipped with the latest security patches, bug fixes, and features.
- Command:
- Install Docker and Docker Compose
- Command:
sudo apt install docker docker-compose - Explanation: Docker is a platform for developing, shipping, and running applications using containerization. Docker Compose is a tool for defining and running multi-container Docker applications. Installing Docker and Docker Compose enables us to efficiently manage and deploy containers for our applications.
- Command:
By running these commands, you'll prepare your system for container deployment, ensuring that you have the necessary tools and updates in place for a smooth and secure experience.
Cloud - Initial Setup & Security Guides
When utilizing a cloud instance, it's crucial to establish robust security measures to safeguard your environment. The following guides offer comprehensive, step-by-step instructions on setting up and fortifying your cloud infrastructure.
DigitalOcean provides a detailed guide on initiating your server setup with Ubuntu. This guide covers essential steps, including:
- Creating a new non-root user with administrative privileges.
- Configuring a firewall using UFW (Uncomplicated Firewall).
- Securing SSH (Secure Shell) by adjusting its configuration settings.
- Implementing additional security measures to fortify your server.
This guide ensures that your cloud instance is set up with fundamental security protocols, laying a solid foundation for further enhancements.
For comprehensive security measures, the GitHub guide by imthenachoman offers a detailed roadmap on securing a Linux server. While not all steps within this guide may be necessary for every scenario, it covers a wide range of security considerations, including:
- Implementing a robust firewall strategy.
- Creating and managing user accounts with appropriate privileges.
- Enhancing SSH security through configuration adjustments.
- Deploying intrusion prevention systems (IPS) like Fail2Ban to mitigate potential threats.
By following the guidance outlined in these comprehensive resources, you can establish a resilient and secure cloud environment, safeguarding your infrastructure and data against potential threats.
Peppermint Install
With our environment updated, upgraded, and equipped with the latest software and security patches, we're ready to deploy our support system. Following the documentation provided by Peppermint, we'll proceed by creating a docker-compose.yml file and configuring it according to their guidelines.
Referencing the documentation available on github
- Create a
docker-compose.ymlfile.

- Paste the configuration provided in the documentation into the file (CTRL+SHIFT+V).
version: "3.1"

services:
  peppermint_postgres:
    container_name: peppermint_postgres
    image: postgres:latest
    restart: always
    ports:
      - 5432:5432
    volumes:
      - pgdata:/var/lib/postgresql/data
    environment:
      POSTGRES_USER: peppermint
      POSTGRES_PASSWORD: 1234
      POSTGRES_DB: peppermint

  peppermint:
    container_name: peppermint
    image: pepperlabs/peppermint:latest
    ports:
      - 3000:3000
      - 5003:5003
    restart: always
    depends_on:
      - peppermint_postgres
    healthcheck:
      test: ["CMD", "sh", "-c", "wget --spider $$API_URL"]
      interval: 30s
      timeout: 10s
      retries: 3
    environment:
      DB_USERNAME: "peppermint"
      DB_PASSWORD: "1234"
      DB_HOST: "peppermint_postgres"
      SECRET: 'peppermint4life'
      API_URL: "http://server-ip:5003"

volumes:
pgdata:- Exit and Save | CTRL+X, Y, ENTER
- After you have created the docker-compose.yml file, run the following command
sudo docker-compose up -d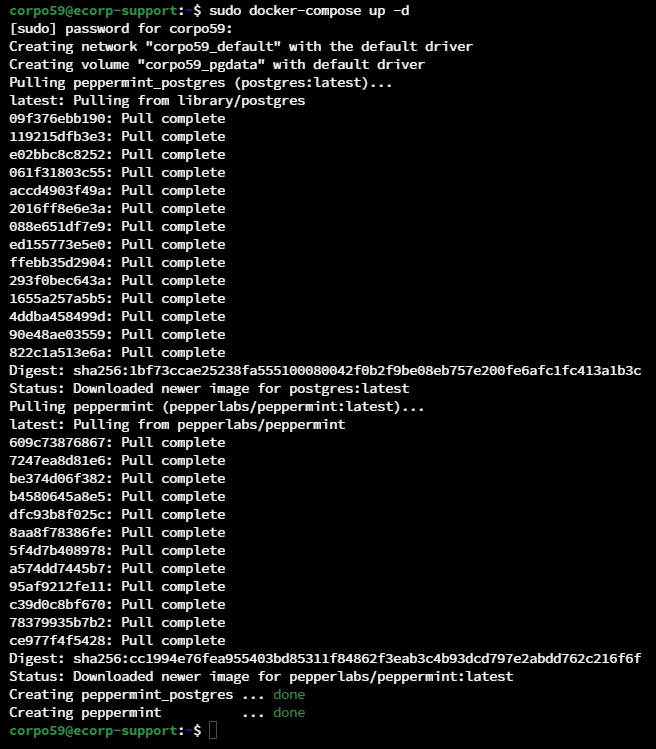
- Wait for the installation to finish
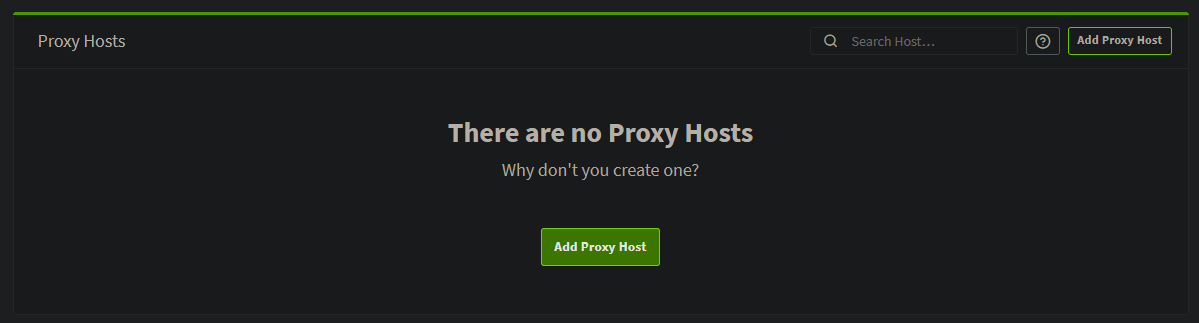
You can now access the application at http://your-server-ip:3000
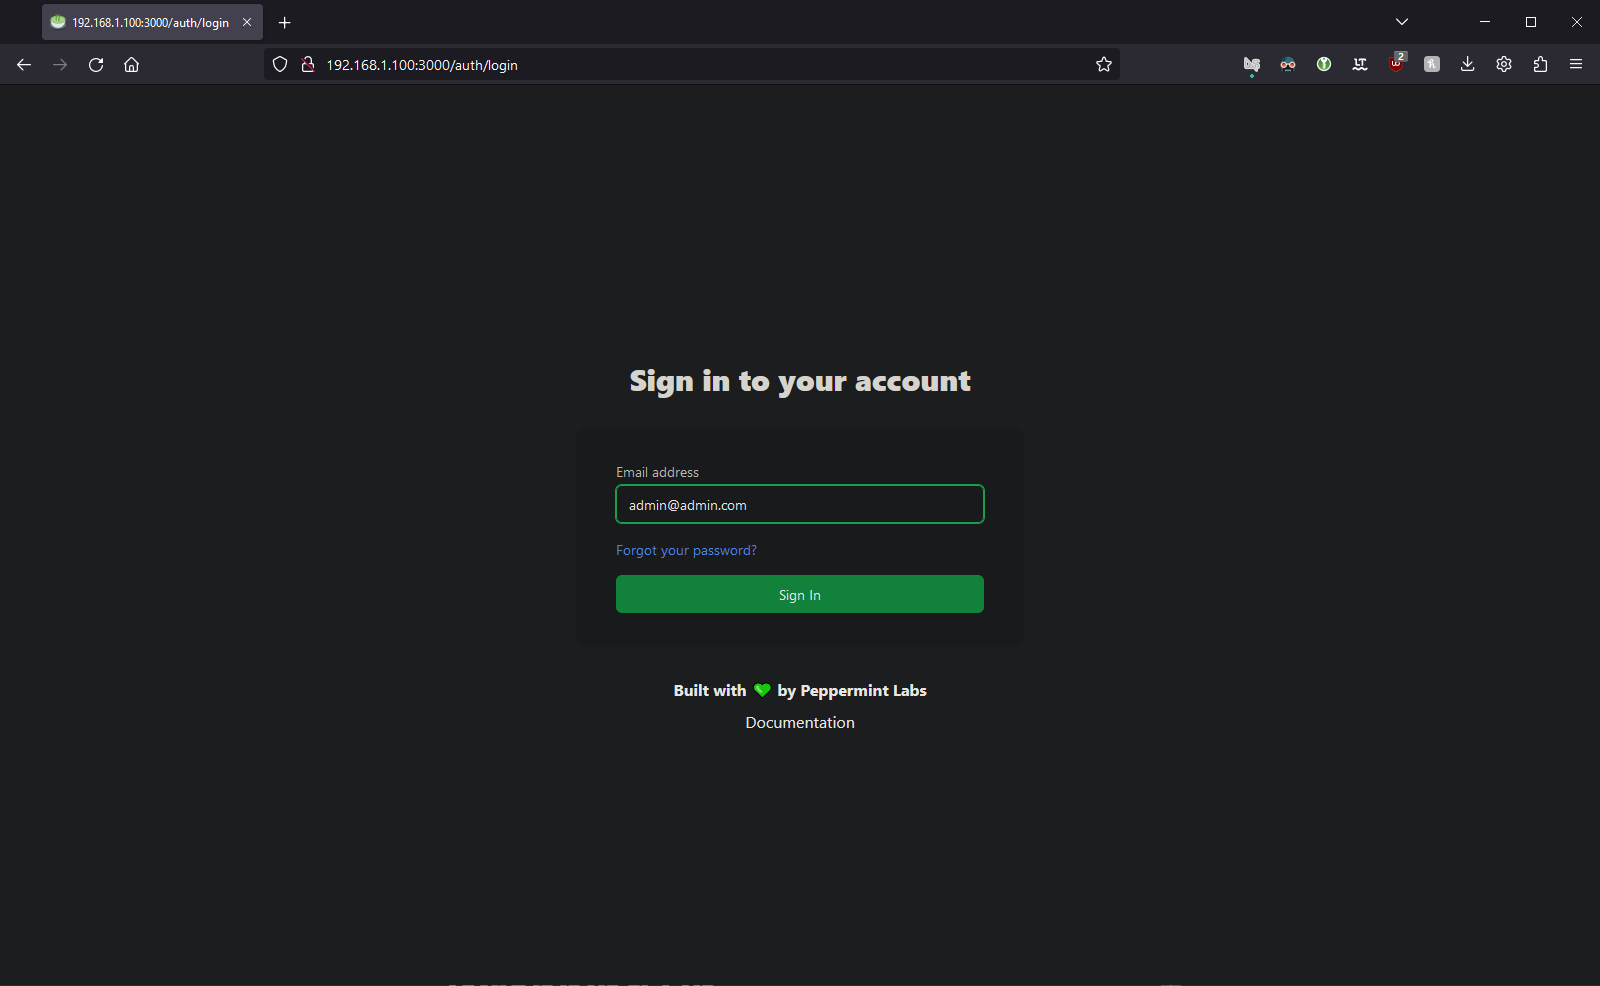
- Peppermint Login
- Email: [email protected]
- Password: 1234
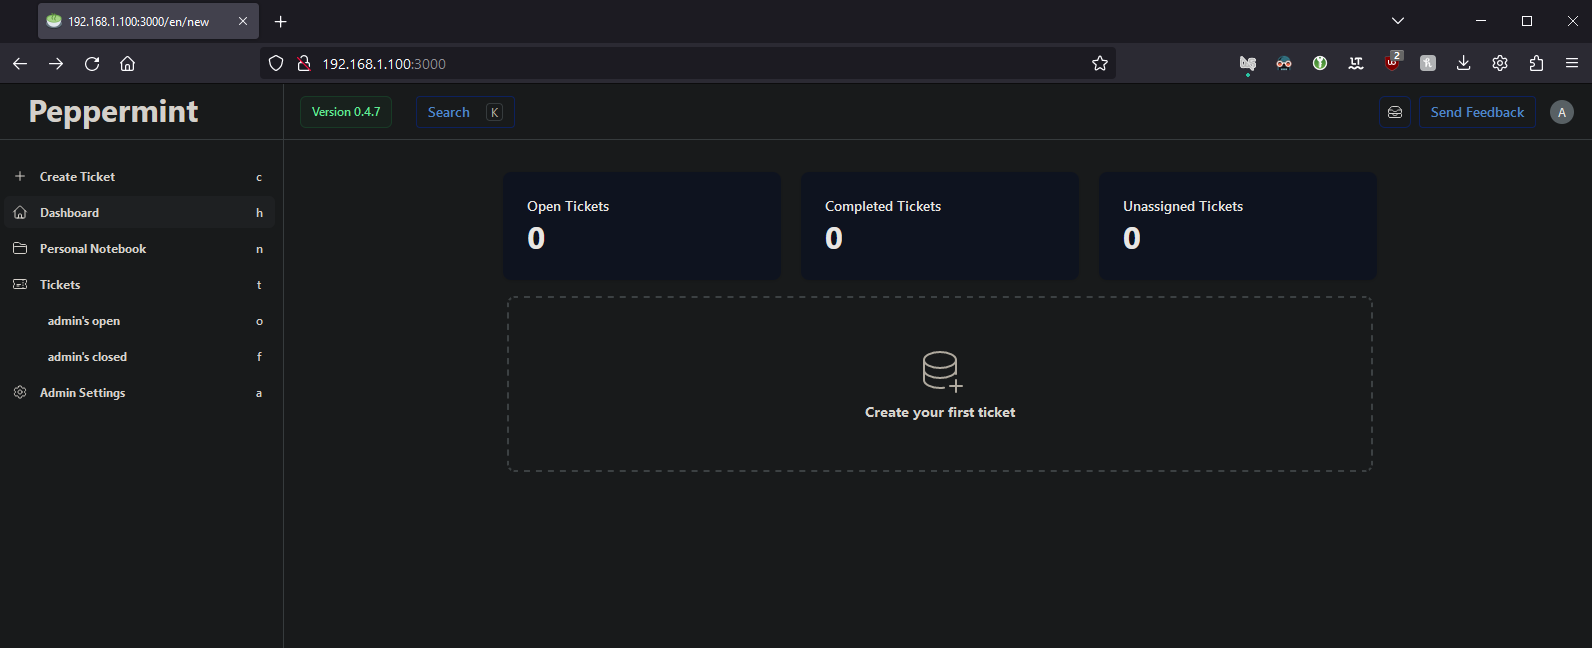
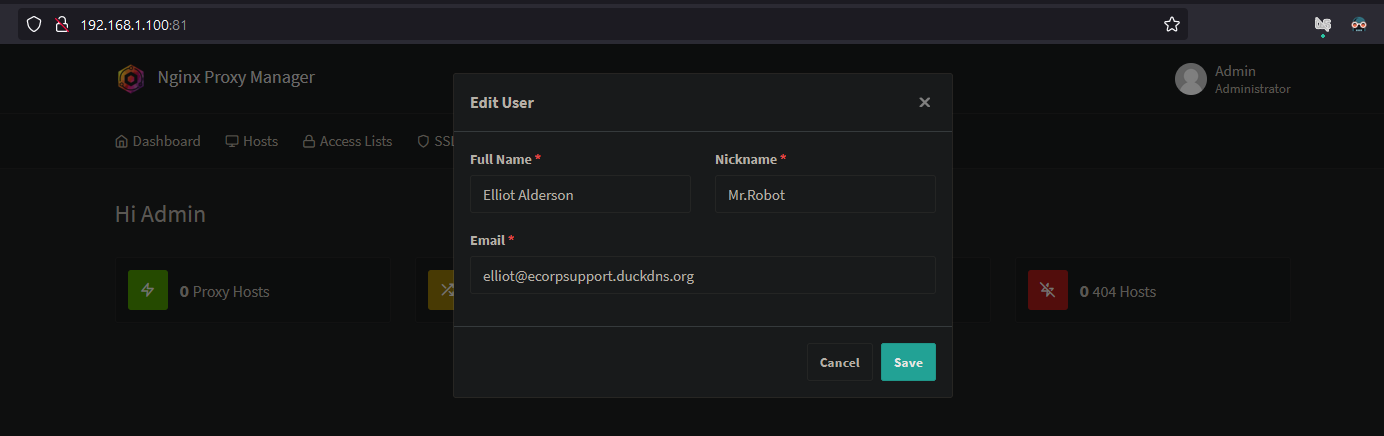
You are now logged into the Peppermint dashboard. Take a moment to explore, reset your password and email, and review the admin settings.
Domains and TLS Certificates
We will now configure secure, encrypted access to our support system, eliminating the need to use the IP address to access the web app. This involves using a reverse proxy and DNS validation for our SSL certificates. Typically, you would point a domain name to a public IP address, but you can also point it to a local IP accessible only within the local network. Nginx Proxy Manager helps handle the Let's Encrypt DNS challenge to obtain a valid SSL certificate for our help desk Docker application without making it public.
DuckDNS + Nginx Proxy Manager (Free)
- Get a Free Subdomain from DuckDNS:
- Register at DuckDNS.
- Create a subdomain, e.g.,
mydomain.duckdns.org.

- Click "Add Domain."
- For the current IP, enter the IP of the VM we configured earlier (e.g., 192.168.1.100).
- For cloud users, simply paste your server IP address.

- Update the IP.

- Copy the API token, as it will be needed for Nginx Proxy Manager.

- Install Nginx Proxy Manager
- Return to the VM terminal.
- Replace the old contents of the docker-compose.yml with the configuration provided by nginxproxymanaer
version: '3.8'
services:
  app:
    image: 'jc21/nginx-proxy-manager:latest'
    restart: unless-stopped
    ports:
      - '80:80'
      - '81:81'
      - '443:443'
    volumes:
      - ./data:/data
- ./letsencrypt:/etc/letsencrypt- Bring up your stack by running
sudo docker-compose up -d- Log in to Nginx Proxy Manager.
- http://server-ip:81/
- Email: [email protected]
- Password: changeme
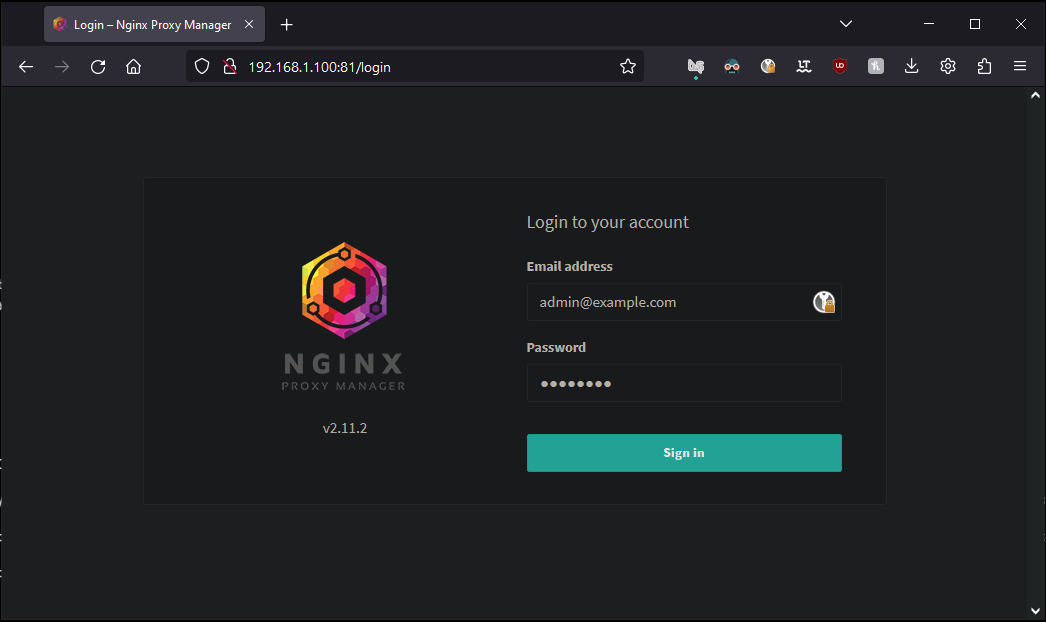
- Change Credentials.
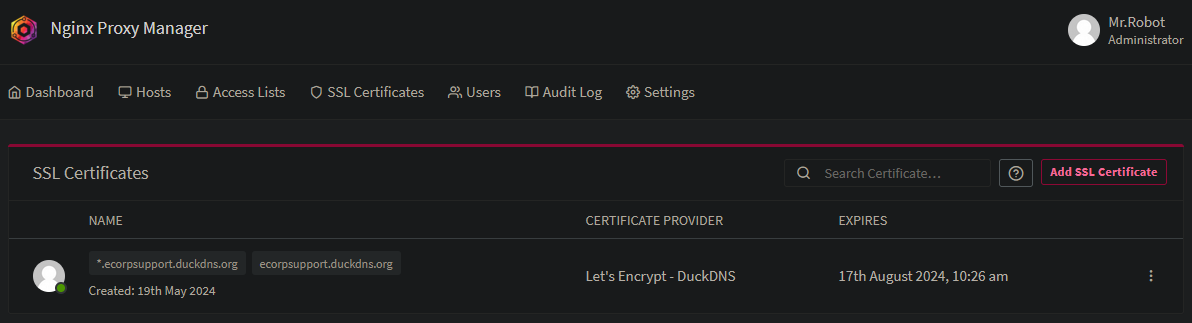
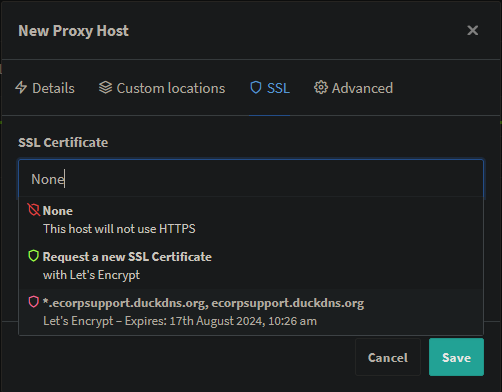
- Navigate to the SSL certificates section.
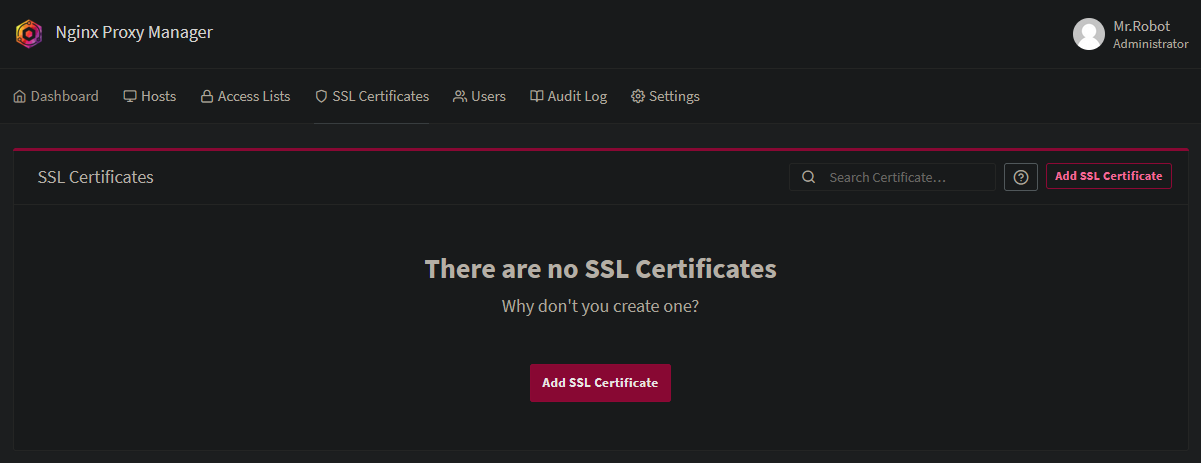
- Click "Add SSL Certificate."
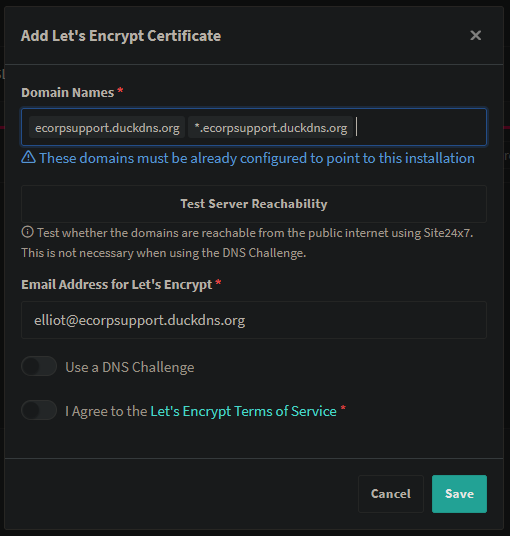
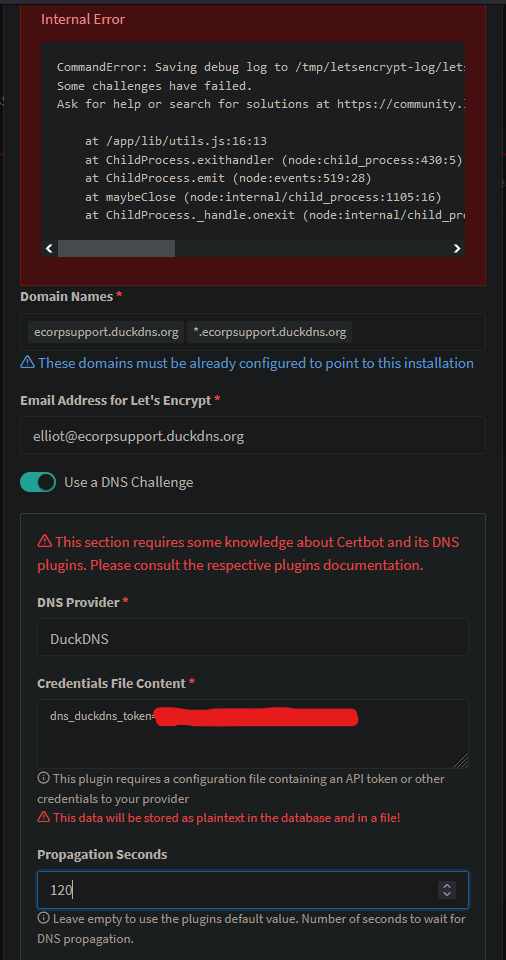
- For domain names, enter your domain and a wildcard, e.g.,
mydomain.duckdns.org, *.mydomain.duckdns.org. - Enable "Use a DNS Challenge."
- Select DuckDNS as the provider.
- In the credentials file content, paste the API token, ensuring there are no trailing spaces.
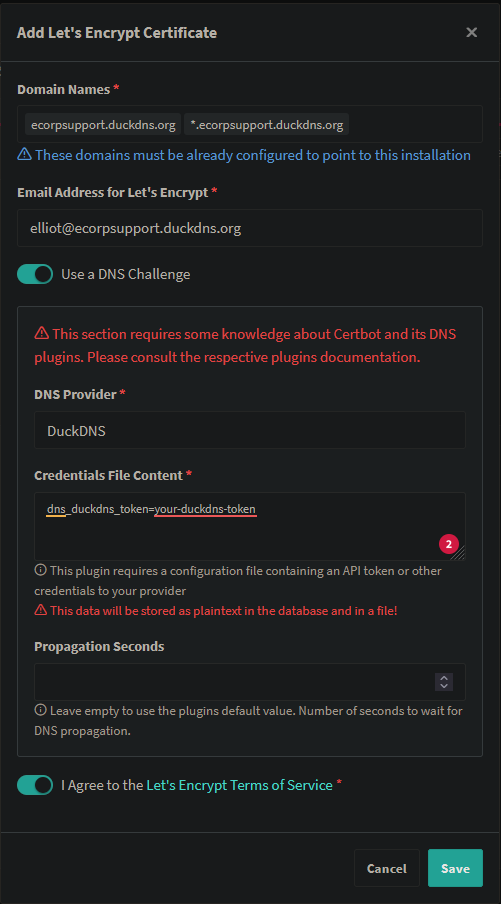
- Agree to the terms of service.
- Save.
- Generate the Certificate
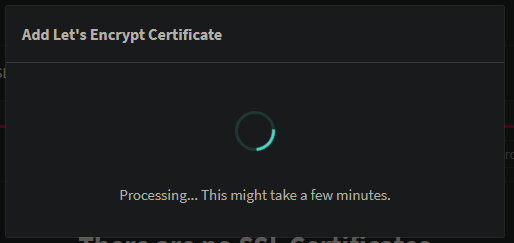
- After some time, the certificate will be generated.
- If an error occurs, it may be due to DNS records not yet propagated. Increase the propagation time to 120 seconds and retry.
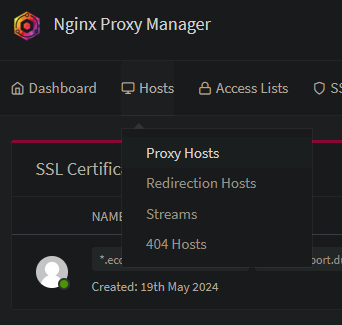
- Next, configure domain names
- Navigate to Hosts, and click Proxy Hosts.
- Add Proxy Host
- Run the following command to find the ip adddress of the Peppermint container
sudo docker inspect -f '{{range.NetworkSettings.Networks}}{{.IPAddress}}{{end}}' peppermint
- Configure The Proxy Host
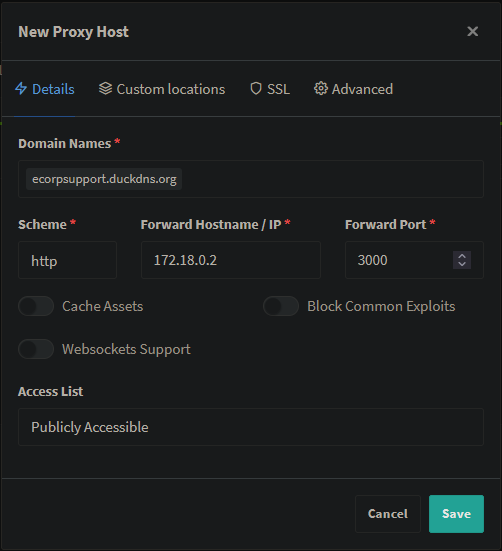
- Navigate to SSL
- Select the SSL certifiate we created earlier
- Force SSL and HTTP/2 Support

- Save


By following these steps, you'll configure secure, encrypted access to your support system using a domain name and an SSL certificate, enhancing the security and accessibility of your application.
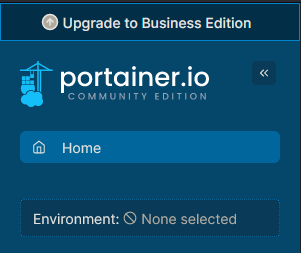
Installing Portainer
Portainer is a powerful container management tool. Following the documentation, we can deploy a management UI to configure our containers to communicate on the same network using hostnames rather than IP addresses. The installation process is straightforward:
First, create the volume that Portainer Server will use to store its database:
sudo docker volume create portainer_data
Then, download and install the Portainer Server container:
sudo docker run -d -p 8000:8000 -p 9443:9443 --name portainer --restart=always -v /var/run/docker.sock:/var/run/docker.sock -v portainer_data:/data portainer/portainer-ce:latest
By default, Portainer generates and uses a self-signed SSL certificate to secure port 9443. Alternatively, you can provide your own SSL certificate during installation or via the Portainer UI after installation is complete. We will use our reverse proxy manager to handle SSL certificates once all containers are on the same network.
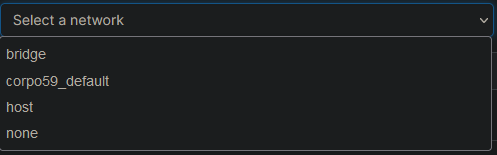
Configure Containers to Join the Same Network
- Navigate to the Portainer page at https://serverip:9443/.
- If prompted with an SSL validity error, make an exception and click "Accept Risk and Continue."
- Create a username and password.
- Once logged in, click the home icon on the left-hand side to skip the quick start.
- In the main page, locate the "Environments" section, and within that, find the "Local" group. Open it by clicking on it.
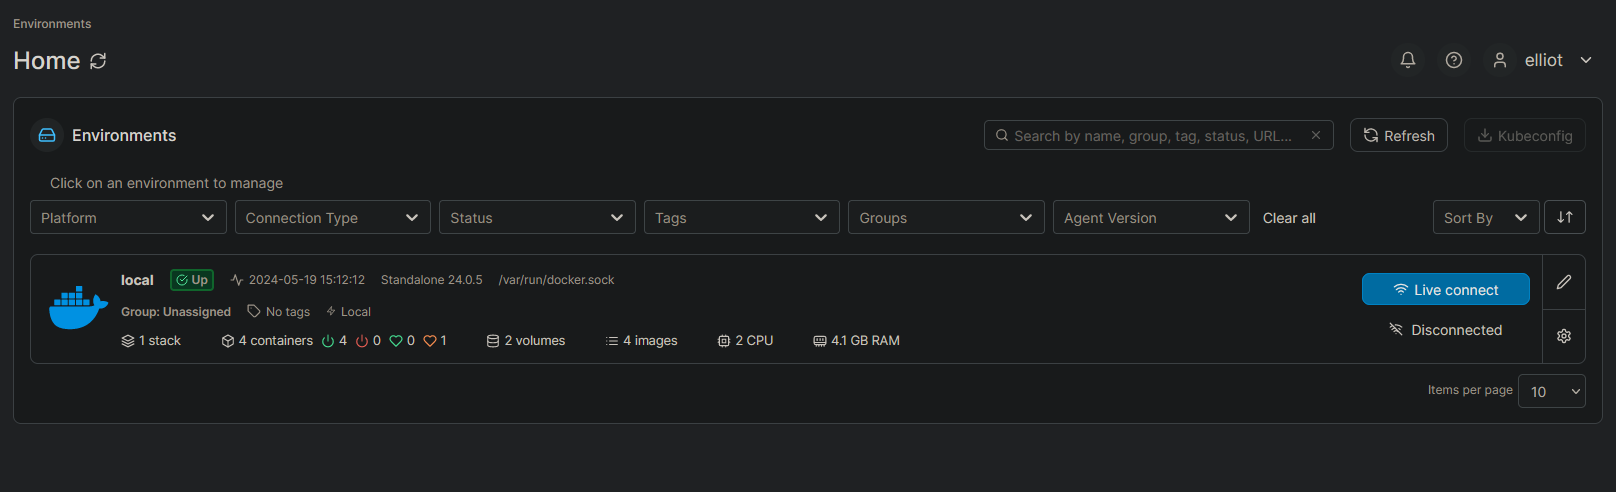
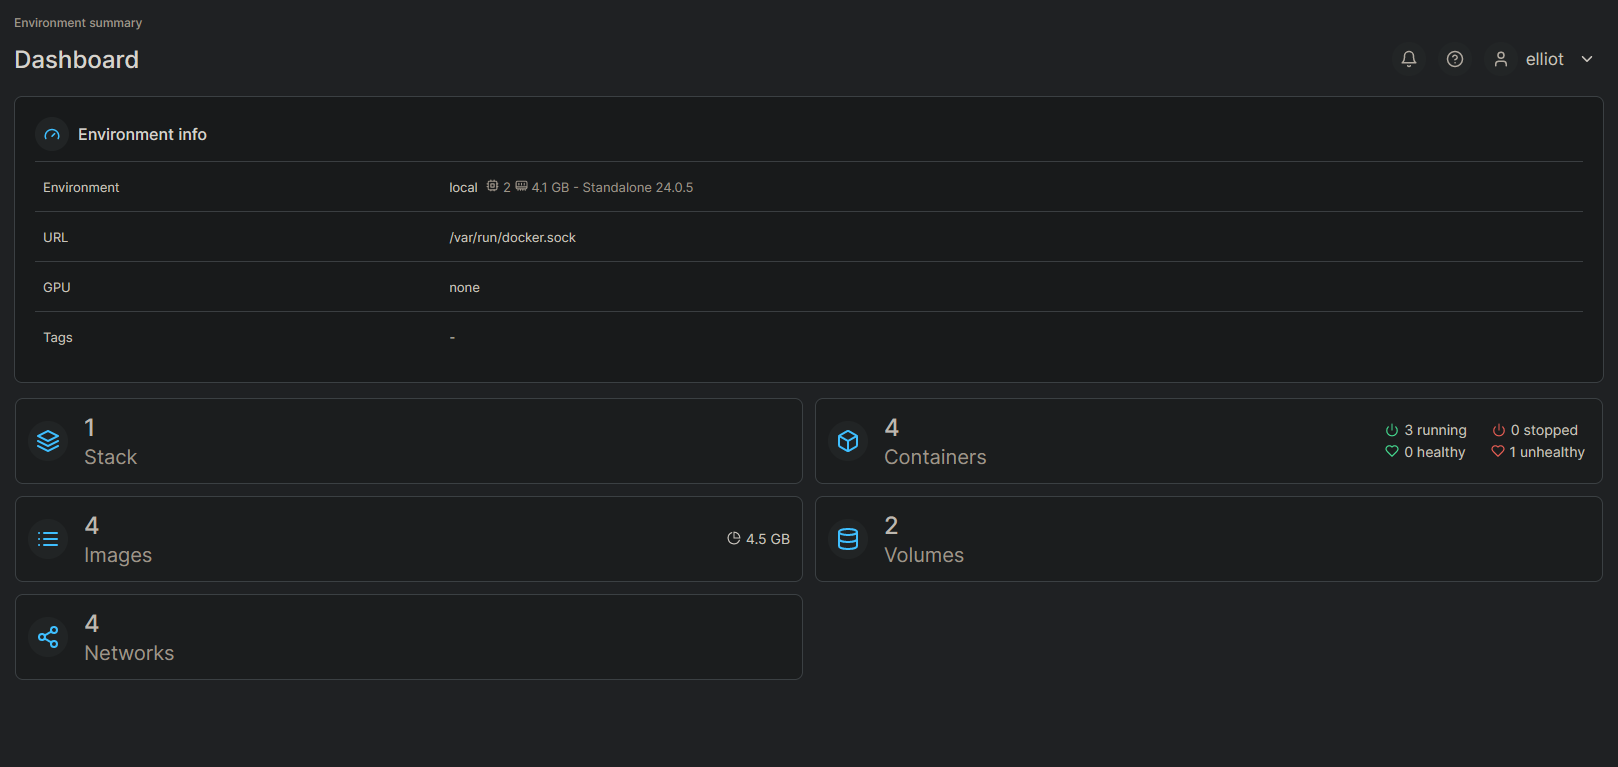
- You'll be taken to a dashboard. Click the "Containers" button.
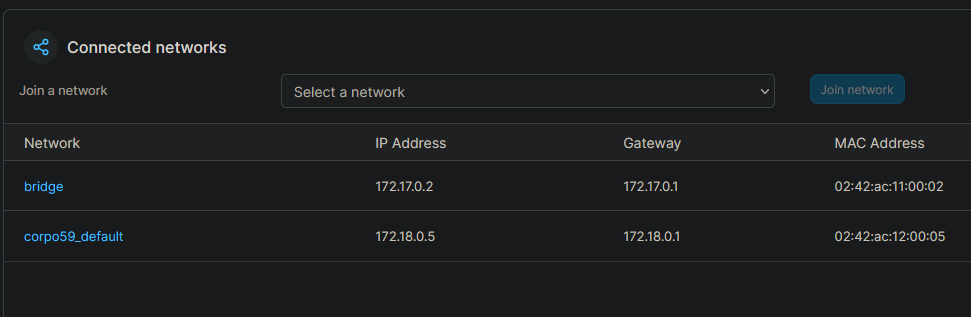
- You'll see a list of containers. Peppermint will consist of two containers: the database (PostgreSQL) and the main app itself (Peppermint).
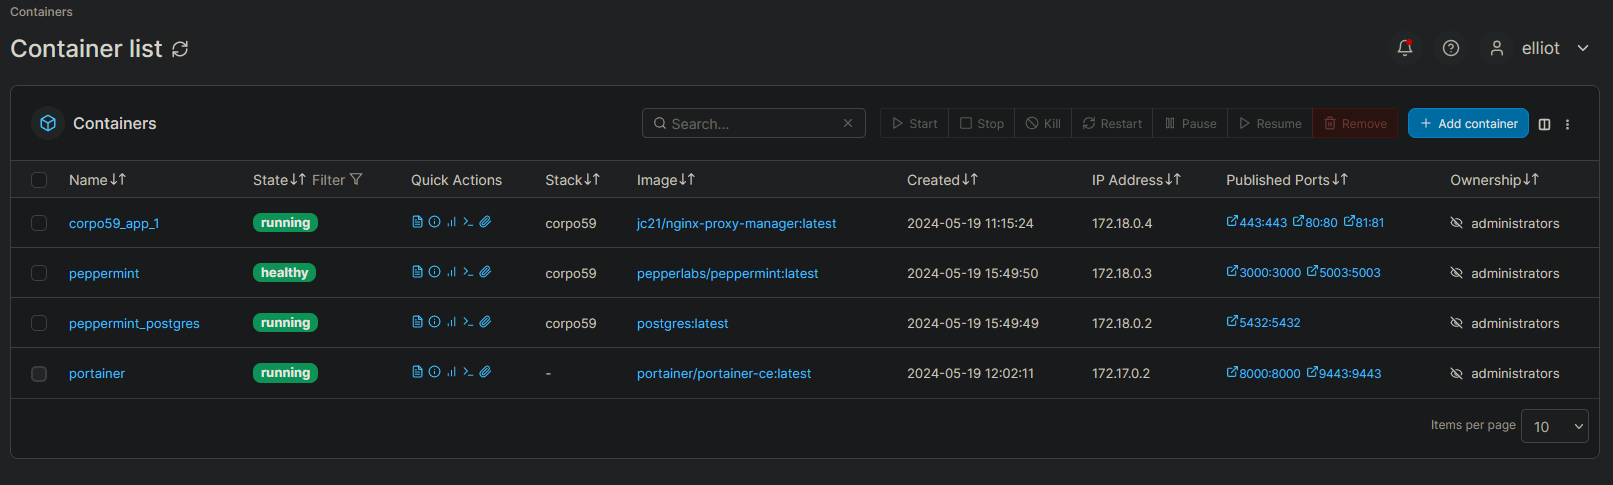
- The Nginx Proxy Manager might not be named as such and may have a default name, but you can identify it by the image tag in the details column.

- Open the Peppermint container.
- Scroll to the bottom of the container details page.
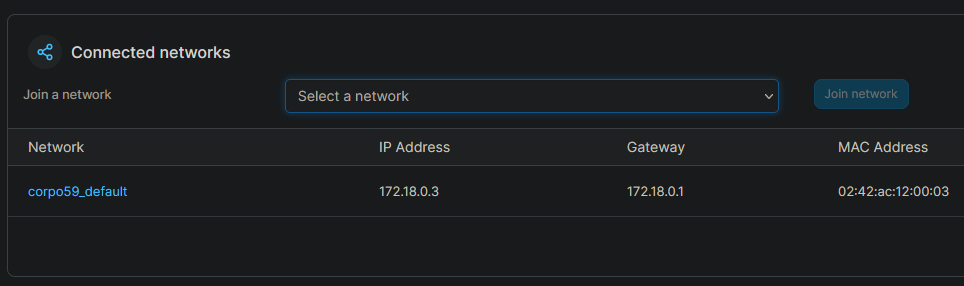
- Join the network that may be named after your VM admin user followed by
_default, for example, "corpo59_default".
- Ensure that all containers you wish to serve SSL certificates for are joined to the same network. There is no need to remove any other connected networks.
- If you wish to give the Portainer UI an SSL certificate, make sure to join the Portainer container to the network with the proxy manager.
Bonus - Give Any Container a SSL Certificate
Now that our containers are on the same shared network, we can head back to Nginx Proxy Manager and set up new Proxy Hosts.
- Go to Nginx Proxy Manager
- Open Nginx Proxy Manager in your browser.
- Click on "Add Proxy Host."
- Setup Proxy Host
- Domain Names: Enter the subdomain you want to use. Since we used a wildcard domain when generating the SSL certificate, you can create any subdomain under the one we made with DuckDNS. For example, if your primary domain is
ecorpsupport.duckdns.org, you can set up a new one likemgmt.ecorpsupport.duckdns.org.
- Domain Names: Enter the subdomain you want to use. Since we used a wildcard domain when generating the SSL certificate, you can create any subdomain under the one we made with DuckDNS. For example, if your primary domain is
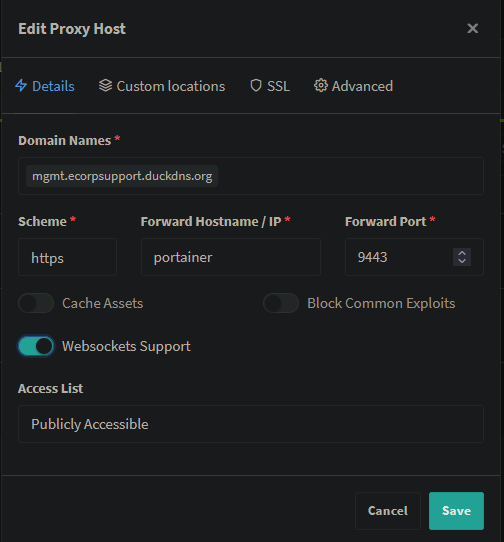
- Forward Hostname / IP: Use the hostname of the container instead of the IP address. This ensures that even if the container IP changes, the hostname remains consistent.
- SSL Configuration
- Go to the SSL tab.
- Select the previously generated SSL certificate.
- Enable "Force SSL" and "HTTP/2 Support."
- Save and Apply
- Save the configuration.
- Your container should now be accessible with the new subdomain and secured with an SSL certificate.
Nginx Proxy Manager SSL Certificate
You can also secure Nginx Proxy Manager itself with an SSL certificate. Simply add a new proxy host, use 127.0.0.1 (localhost) and port 81, and keep the scheme set to HTTP. In the SSL tab, select the SSL certificate, and enable “Force SSL” and “HTTP/2 Support.” This setup secures the Nginx Proxy Manager interface, ensuring encrypted access.
By following these steps, you can easily assign SSL certificates to any container within your network, ensuring secure, encrypted access to your services.
Practice Scenario
With our support system now deployed, complete with domain names and SSL certificates, we can move on to simulating real-world scenarios. I'll walk you through a practice scenario where a user submits a ticket detailing their issue and outlining the troubleshooting methodology.
To begin, I've created a Windows 10 VM with intentional misconfigurations. You can replicate this setup by using the Windows Media Creation Tool to create an ISO file, which you can then use to set up a new VM in VirtualBox or VMware. The steps are similar to installing Ubuntu, but this time you'll use the Windows 10 ISO.
First, we'll start from the perspective of an end user who needs to submit a ticket.
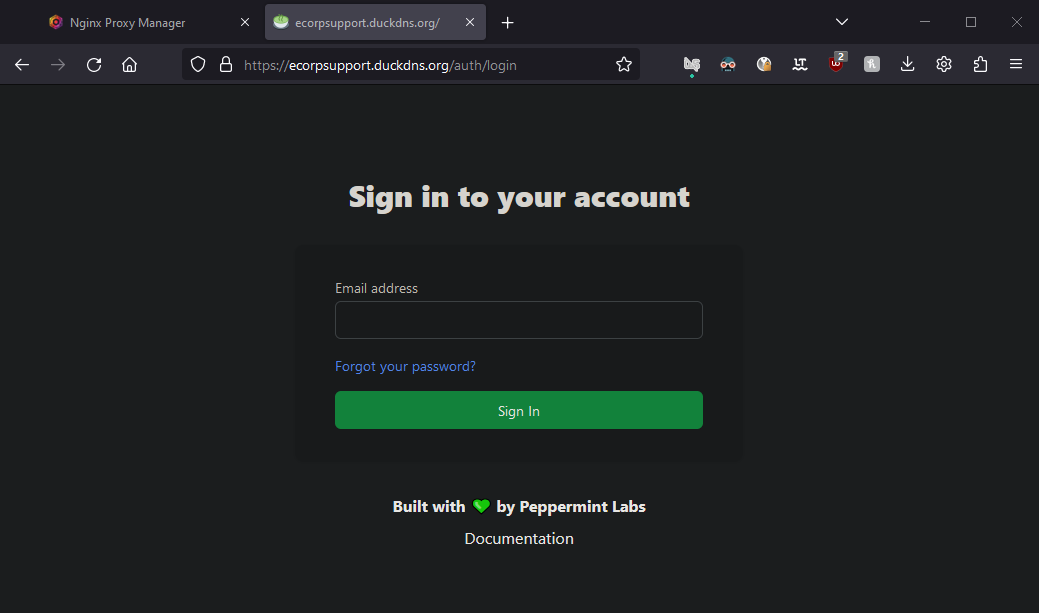
- Register an Account:
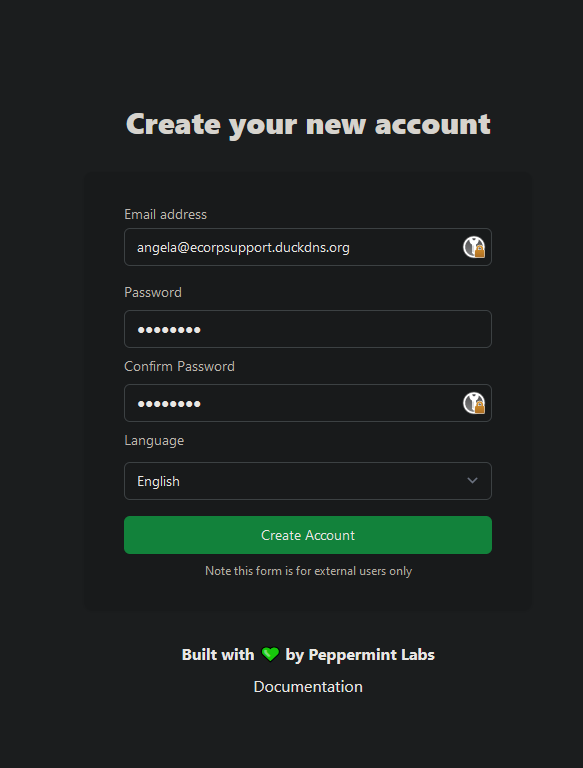
- Visit the User Portal at https://yourdomain.duckdns.org/auth/register and create an account.
- Log In and Create a Ticket
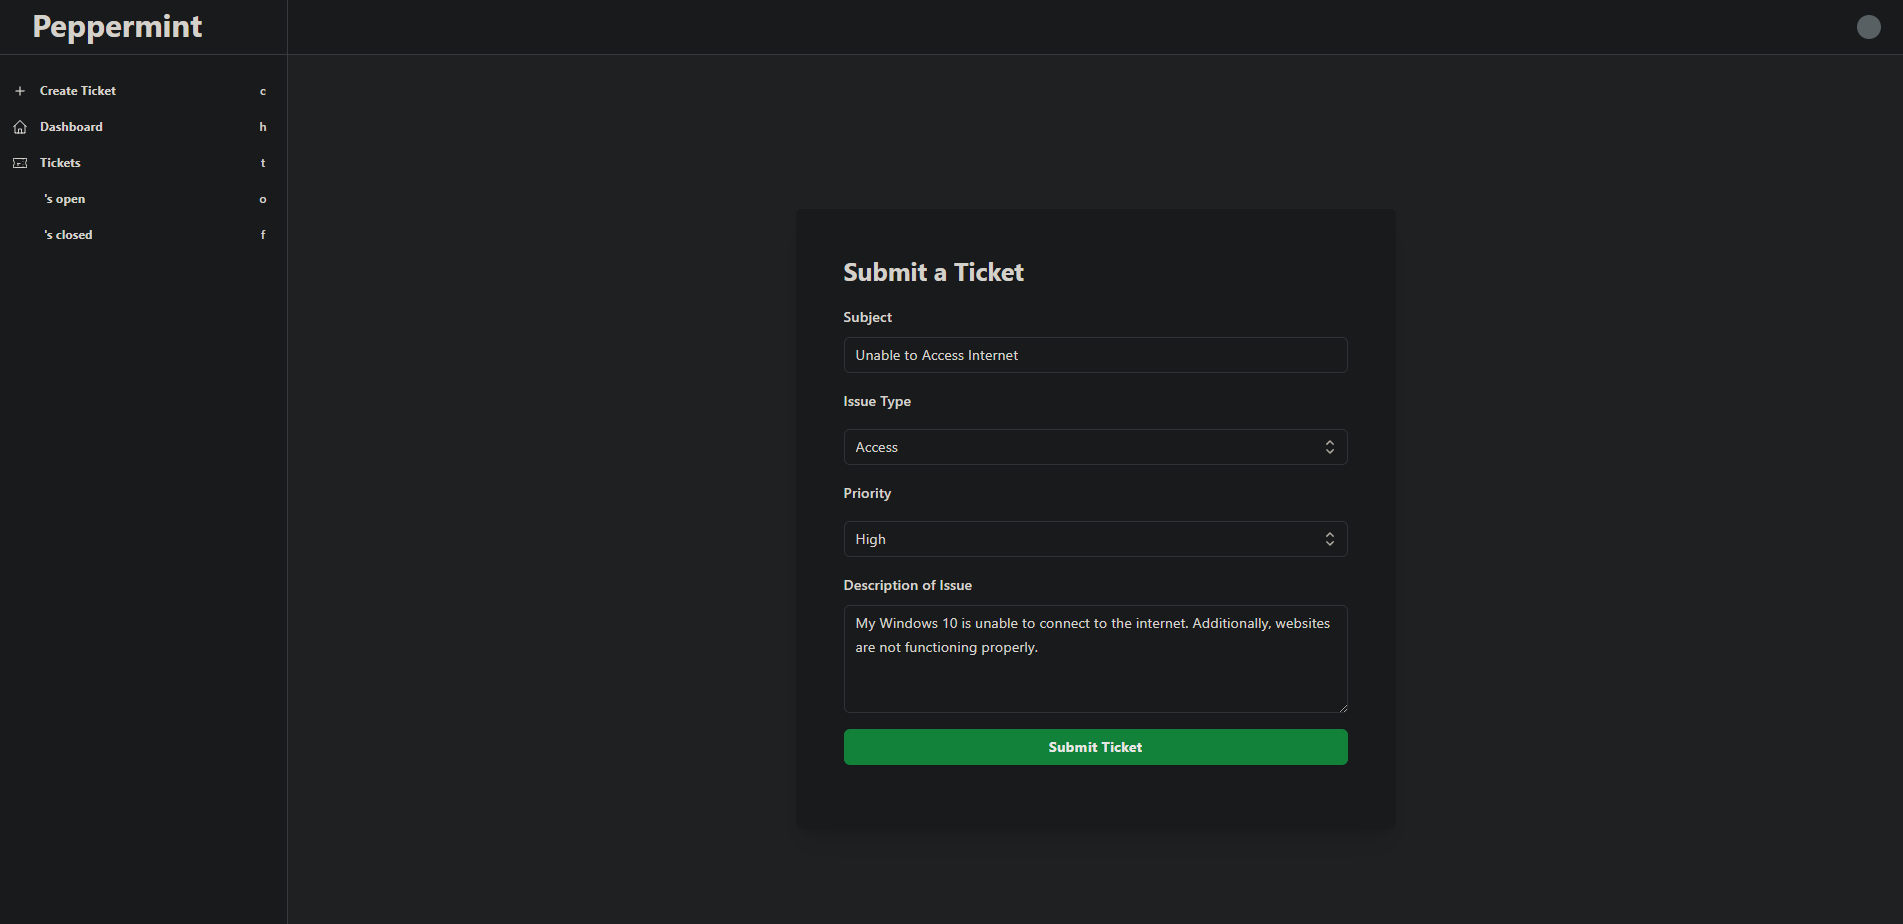
- Log in with the user account you just created at https://yourdomain.duckdns.org/auth/
- Once logged in, navigate to the "Create Ticket" section.
- Fill in the details for the ticket:
- Subject: Unable to Access Internet
- Issue Type: Access
- Priority: High
- Description: My Windows 10 is unable to connect to the internet. Additionally, websites are not functioning properly.
- Submit.
For the sake of imagination, we will fill out the ticket as the end user, describing the issue in detail.
Administrator Perspective
To effectively manage and resolve the tickets, you need to log in as an administrator. Use a private window to keep both sessions active simultaneously.
- Log In as Administrator
- Open a private/incognito window.
- Log in to the admin account at https://yourdomain.duckdns.org/auth/login.
- Review and Close Tickets
- Navigate to the admin dashboard and locate the newly submitted ticket.

- Review the details provided by the user.
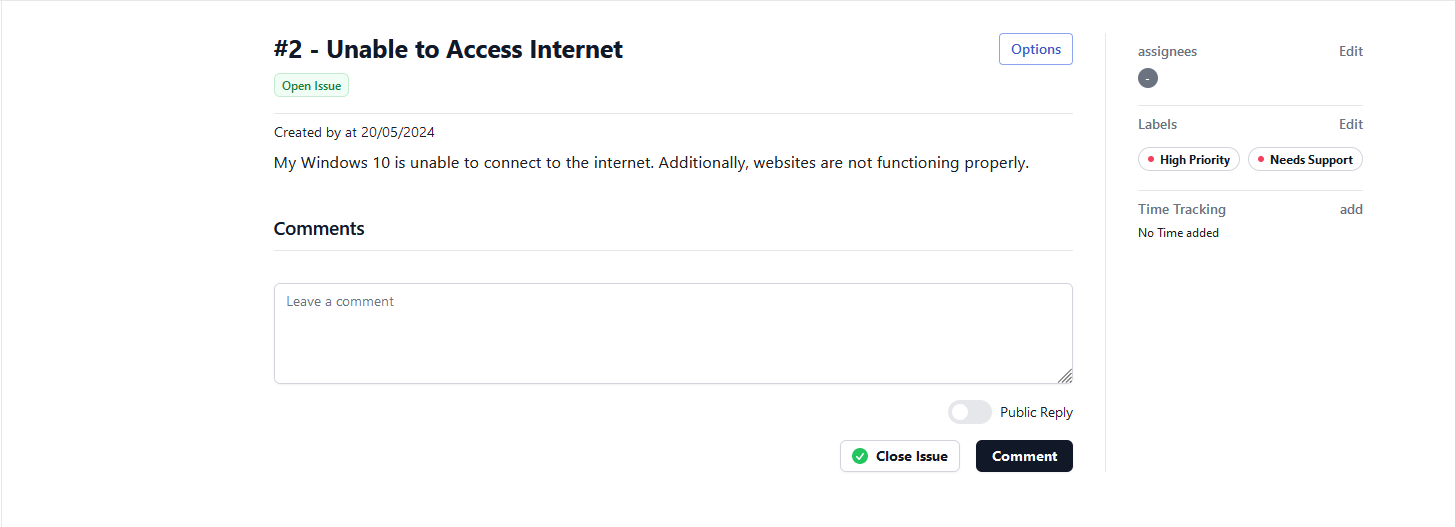
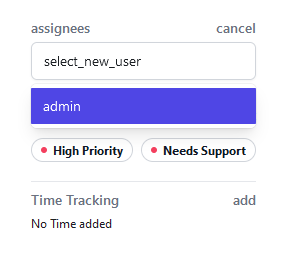
- Assign yourself to the ticket.
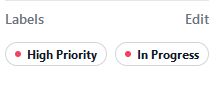
- Change the status of the ticket to "In Progress"
- Follow the troubleshooting methodology to resolve the issue.
- Identify the problem
- Establish a theory of probable cause
- Test the theory to determine the cause
- Establish a plan of action to resolve the problem and identify potential effects
- Implement the solution or escalate as necessary
- Verify full system functionality and, if applicable, implement preventive measures
- Document findings, actions, outcomes and lessons learned
- Once resolved, update the ticket status and close it.
By simulating this scenario, you will gain practical experience in both submitting and managing support tickets, which is crucial for effective help desk operations.
Wrapping Up
Today, we set off on an exploration into the realms of containerization, virtualization, and technical documentation. Within this meticulously curated environment, resembling a support hub, we've delved deep into the complexities of IT support, solving technical puzzles, and painstakingly recording our discoveries.
But this adventure goes beyond merely setting up a help desk system. It's about immersing ourselves in real-world scenarios, honing our skills, and crafting our resumes with valuable hands-on experience. Our DIY help desk isn't just a project; it's a testament to our dedication to mastering the nuances of IT and cybersecurity.
Throughout this chapter, we've accomplished a myriad of tasks, each contributing to our journey:
- Creating a Virtual Machine: We kicked off our adventure by setting up a virtual environment, laying the foundation for our support hub.
- Deploying a Cloud Instance (optional): Exploring the cloud, we deployed instances to expand our reach and flexibility.
- Installing and Configuring Ubuntu: With precision and care, we configured the operating system, ensuring a stable foundation for our endeavors.
- Deploying Container Applications with Docker: Leveraging the power of Docker, we brought our support hub to life, streamlining our workflow.
- Secured Container Services with SSL Certificates: Elevating our support environment, we've granted our container services their own domains adorned with SSL certificates, ensuring secure connections.
- Simulating Help Desk Scenarios: Delving into real-world scenarios, we simulated a misconfigured Windows 10 VM, meticulously documenting issues and findings with Peppermint.
As we conclude this chapter, let's celebrate every challenge conquered and ticket resolved. Each accomplishment adds to our repertoire, equipping us for the dynamic landscape of IT and cybersecurity. Here's to our DIY Help Desk Adventure - a journey of learning, growth, and endless possibilities.